
If you’re reading this, then chances are that you’re seriously considering follicular unit transplantation (FUT) hair restoration. You’ve probably got the basics down, but what actually takes place during the surgery itself? What will your experience be like from arriving at the office to heading back home?
For context, I spent time working as a surgical assistant at a top hair restoration center. I’ve participated in hundreds of hair restoration surgeries—many of them being FUT procedures. Drawing from that hands-on experience, I’m going to break down precisely what occurs during an FUT surgery so you’ll walk in fully prepared.
Note: This article focuses specifically on FUT hair transplants. There’s an alternative method called follicular unit extraction (FUE) that I discuss in another article
.
Table of Contents
The 6 Steps of an FUT Hair Transplant Procedure
An FUT hair transplant consists of six main steps:
- Pre-op
- Injecting local anesthesia
- Strip excision
- Creating recipient sites
- Transplanting
- Post-op
Let’s dive into what each stage involves.
FUT Hair Transplant Part 1: Pre-Op
Pre-op is the first step of any hair transplant procedure. As the name suggests, pre-op covers everything that takes place before the surgery begins. This phase includes:
- Going over your medical history and procedure details
- Documenting “before” photographs
- Getting you into a surgical gown
- Recording vital signs
- Administering pre-procedure medications
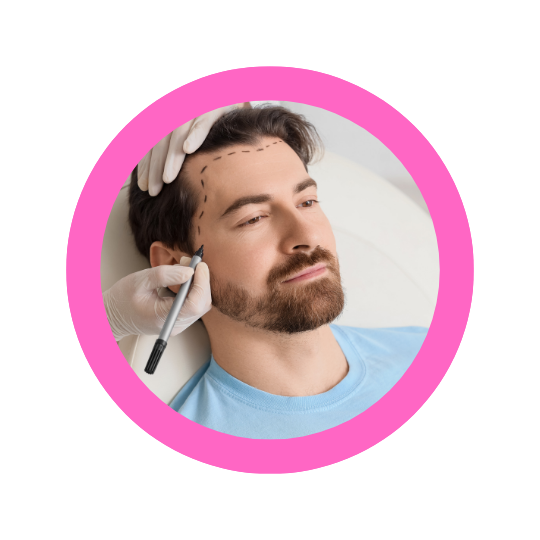
- Trimming the donor and/or recipient zone(s)
- Marking out the donor strip location and recipient zones
When it comes to FUTs, you typically only need to shave down a narrow, horizontal section at the back of the head (i.e. where the strip of tissue will later be taken from). This is different than FUEs because FUEs require shaving the entire donor zone where individual follicles will be harvested from, which covers most of the back and sides of the head.
Note: FUT procedures tend to be more popular among women since they can keep most of their hair long, which also helps conceal the linear scar during healing.
From my experience as a surgical assistant, the choice between FUT and FUE often comes down to personal priorities. FUT allows for harvesting a larger number of grafts in a single session and tends to be more cost-effective per graft. However, it does leave a linear scar that’s visible if you shave the back of your head.
Note: You may have seen this before without realizing it. If you’ve ever noticed a thin horizontal white line across the back of someone’s head, chances are they’ve had an FUT hair transplant procedure done in the past.
I remember working with patients who were very concerned about scarring. With proper closure techniques and good healing, the scar typically becomes a thin, pale line that’s easily hidden by hair as short as half an inch. Many patients returned months later happy with how well their scar had healed and how unnoticeable it was with even moderately short hair.
FUT Hair Transplant Part 2: Injecting Local Anesthesia

The second stage involves numbing the donor area. The medical team will inject local anesthetic along the back of your head where the strip will be extracted. For most people, getting these injections is the most uncomfortable moment of the entire surgery.
After the anesthetic takes effect, you should feel pressure and tugging sensations but no sharp pain. If you experience any burning or stinging sensations, immediately inform the surgical staff. The combination of local anesthesia and the oral sedative you took during pre-op should keep you comfortable and relaxed throughout the procedure.
Note: Many patients describe the numbing sensation as feeling like they’re wearing a tight headband or swimming cap around their head.
FUT Hair Transplant Part 3: Strip Excision

The third step is strip excision, which is when a thin strip of scalp containing hair follicles is carefully removed from the back of your head. This is one of the defining characteristics that sets FUTs apart from FUEs.
During this portion of the procedure, you’ll be positioned face-down. Using precise incisions, the surgeon will carefully excise a horizontal strip of scalp from the donor zone—typically from the area between your ears across the back of your head. The dimensions of this strip vary based on how many grafts you need, but it’s generally about one to two centimeters wide.
This portion is fairly quick. You won’t feel pain due to the anesthesia, though you may sense some pressure. You’ll be allowed to listen to music during this time. Once the strip is removed, the surgeon will close the incision using sutures.
Meanwhile, surgical assistants immediately begin processing the excised strip under high-powered microscopes. They carefully separate the strip into individual grafts, sorting them by the number of hair follicles they contain (e.g. singles, doubles, triples). This work is crucial because it maximizes graft survival and ensures that there are the right types of grafts for different areas.
Question: Why would someone choose to get an FUT over an FUE if it leaves a scar?
Answer: Great question! FUT offers several advantages despite the linear scar. First, it allows surgeons to harvest significantly more grafts
That said, an FUT isn’t ideal for everyone. If you prefer wearing your hair extremely short (think buzz cut), then an FUE might be a better option since it leaves scattered, barely-noticeable scars instead of one obvious linear scar.
FUT Hair Transplant Part 4: Creating Recipient Sites
The fourth stage involves creating the tiny openings where each graft will be inserted. (You’ll be sitting upright from this point forward!)
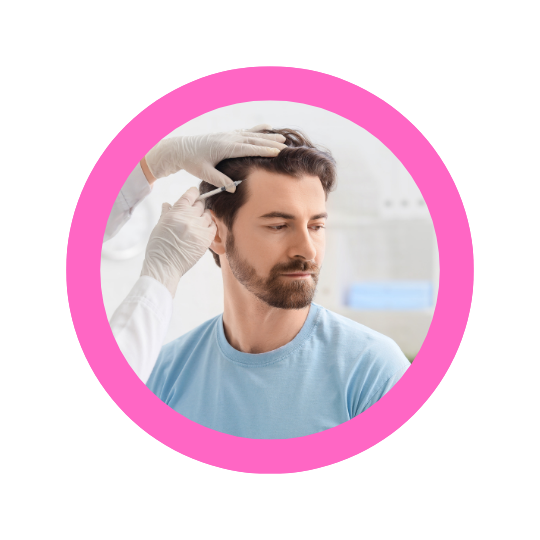
After lying face-down during strip removal, you’ll transition to a seated position for the remainder of the surgery. The surgeon will inject the recipient zones (typically your hairline and crown area) with additional local anesthetic.
Once numbness is achieved, the surgeon will make recipient sites, which are minuscule incisions where individual grafts will be placed. The surgeon employs a fine, sharp blade to create these openings. They’ll consider your natural hair growth patterns, making sure that each incision follows the proper angle for hair to emerge in the correct direction.
Note: Throughout this phase, you’ll need to maintain a forward-facing position. No reading or laptop use, though you’re welcome to watch your preferred shows or films. (Most offices have TVs.) Some facilities will permit phone use provided you can hold it directly in front of you and look straight ahead.
This typically requires thirty minutes to an hour, depending on your total graft count. After creating recipient sites, you’ll get a lunch break. This interval allows the surgical team to organize for the placement phase while giving you an opportunity to eat, move around, and use the restroom.
FUT Hair Transplant Part 5: Transplanting
Now, we reach the most time-intensive segment: transplanting grafts into the recipient sites. This is where all those carefully prepared grafts from the excised strip get positioned into the tiny incisions that the surgeon just made.
You’ll remain sitting upright during this entire segment. Placing all of the grafts generally takes around four to five hours for a case involving 2,500 to 3,000 grafts.
The placement work is primarily performed by the surgical assistants. Since there are usually a few thousand grafts to place, the surgical assistants will work in teams, with two to four assistants working simultaneously. Using forceps, each graft is gently inserted into a recipient site.
Different graft types go to specific locations for optimal results. Single-follicle grafts typically go along the very front of the hairline to create a soft, natural-looking edge. Two- and three-follicle grafts are positioned behind the hairline and throughout the crown to build volume and coverage.
Note: Approximately one millimeter of each graft will protrude from the skin initially. While this might look concerning at first, it’s actually intentional for achieving smooth outcomes. Forcing grafts completely beneath the skin can create depressions in the scalp and ingrown hairs, which we definitely want to avoid.
FUT Hair Transplant Part 6: Post-Op

After all grafts are positioned, you’re essentially finished! The surgical team will clean both the donor and recipient zones, take “after” photographs, and give you with post-op care instructions. You’ll receive medications to take home, including antibiotics for infection prevention and pain relievers.
Note: Unlike FUE patients, FUT patients sometimes do need the prescribed pain medication for a few days after the procedure due to the donor area incision, though discomfort is usually manageable. Patients usually describe the donor area as feeling more sore than painful a few days post-op.
You’ll also receive care instructions, including:
- Sleeping position: elevated at forty-five degrees for the first few nights
- Showering timeline: after 24 to 48 hours
- Proper hair washing technique: gentle patting with water only for the first few days
- Activities to refrain from: no vigorous exercise, bending forward, or activities that increase blood flow to your head for the first week to prevent graft displacement
- Knowing which symptoms are normal vs. which ones should prompt you to contact the office
- Suture removal appointment: scheduled for 10 to 14 days post-op
The following day, you’ll have a hair wash appointment where the surgical assistants will carefully wash your scalp and demonstrate the proper technique, while the surgeon will perform an evaluation to confirm everything is healing correctly.
Note: One important difference with FUT is the suture removal. You’ll need to return to the clinic ten to fourteen days after your procedure to have your stitches removed from the donor area. This is a quick, painless process.
Follow-up visits are generally scheduled at several-month intervals to track your progress, though the precise schedule varies by surgeon. During these appointments, they’ll photograph your hair growth progression and address any questions you have.
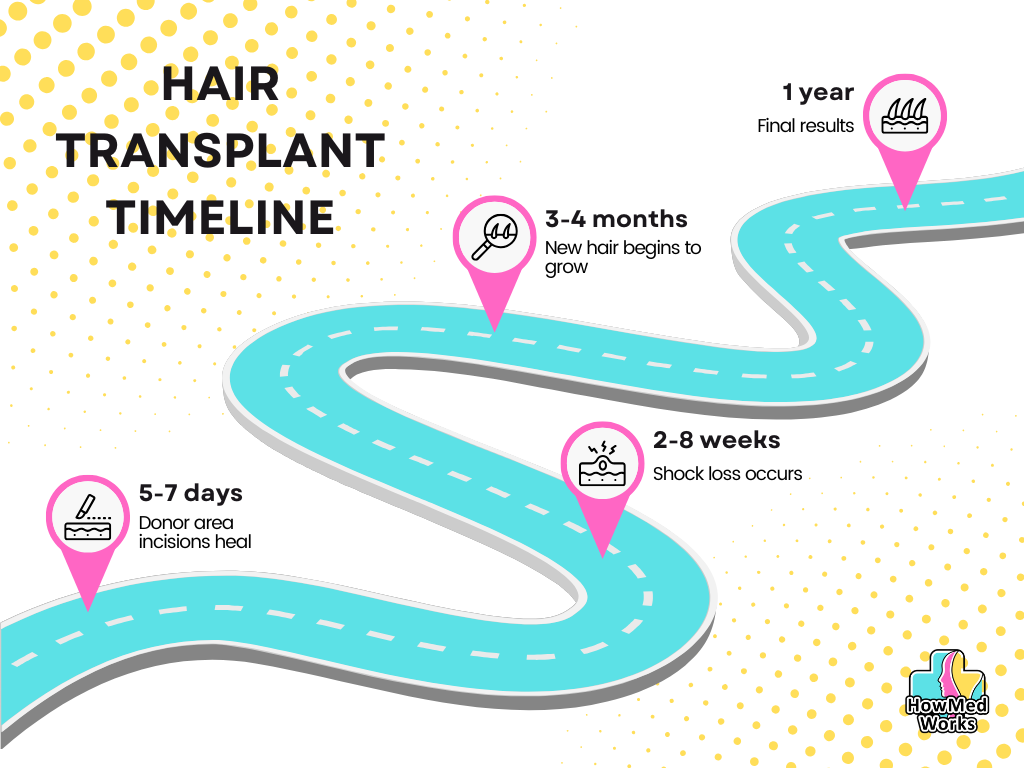
Generally, new growth from a hair transplant becomes visible at three to four months, with final results apparent around twelve to eighteen months. This timeline exists because hair follicles experience a dormant phase lasting several months before new hair production begins.
Note: If you see that your newly transplanted hair is shedding within the initial few weeks, stay calm—this is normal! This temporary loss, called “shock loss,” happens due to inflammation and surgical stress on the transplanted follicles, causing them to enter their dormant phase. However, the roots stay intact beneath the skin and will generate new, permanent hair growth in subsequent months.
As a visual guide, here’s the timeline you can expect for hair transplant results:
Conclusion
That’s the complete step-by-step walkthrough of what happens during an FUT hair transplant procedure! From entering the clinic for pre-op to departing with your new grafts in place, you now understand exactly what the experience entails.
If you’re genuinely considering an FUT hair transplant, invest time in thorough research and select an experienced surgeon. Ask plenty of questions during your consultation, examine before and after photographs from actual patients, and ensure that you feel confident in the entire team.
For more information about FUT hair transplants, check out my other article “Everything to Know About FUT Hair Transplant: A Surgical Tech’s Perspective.” I cover topics like costs, success rates, and healing times.
Great job finishing this article and see you in my next one! Stay healthy and keep learning. 😀